

19/38
\begin{frame}{Exercise}
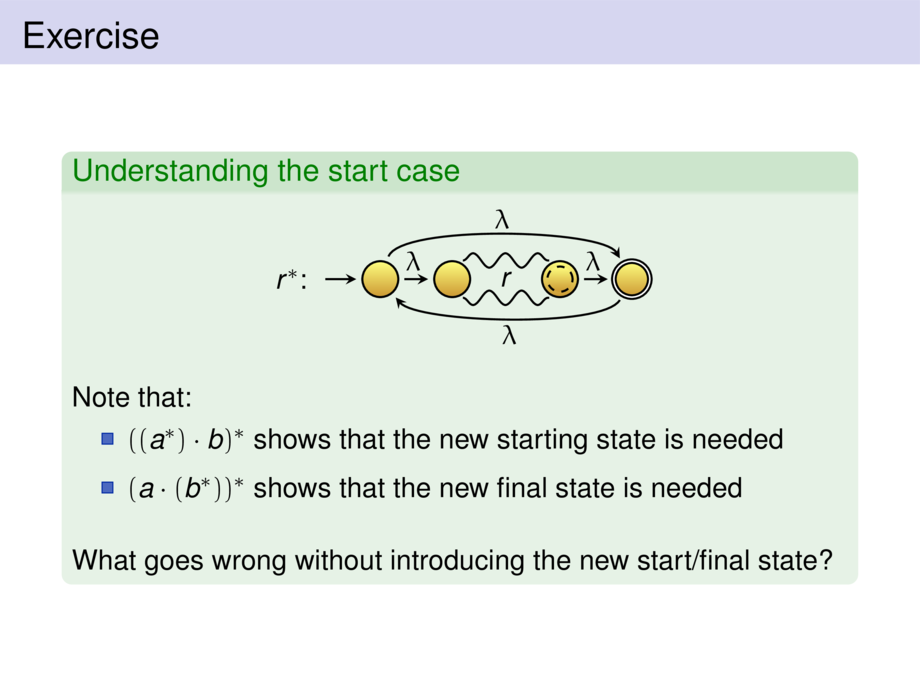
\begin{exampleblock}{Understanding the start case}
\begin{center}
\begin{tikzpicture}[default,node distance=12mm,->,s/.style={minimum size=5mm}]
\node (q0) [state,s] {}; \draw ($(q0) + (-8mm,0mm)$) -- (q0);
\subnfa{r}{$(q0)+(10mm,0mm)$}
\node (qf) at ($(rf) + (10mm,0mm)$) [fstate,s] {};
\draw (q0) to node [above,pos=.4] {$\lambda$} (rs);
\draw (rf) to node [above,pos=.4] {$\lambda$} (qf);
\draw (q0) to[out=70,in=120,looseness=.4] node [above,label] {$\lambda$} (qf);
\draw (qf) to[out=180+60,in=180+130,looseness=.4] node [below,label] {$\lambda$} (q0);
\node [left of=q0,anchor=east,node distance=9mm] {$r^*$:};
\end{tikzpicture}
\end{center}
Note that:
\begin{itemize}
\item $((a^\ast)\cdot b)^\ast$ shows that the new starting state is needed
\item $(a\cdot(b^\ast))^\ast$ shows that the new final state is needed
\end{itemize}
\bigskip
What goes wrong without introducing the new start/final state?
\end{exampleblock}
\end{frame}