

94/205
\begin{frame}
\small
\vspace{-1ex}
\begin{example}
\smallskip
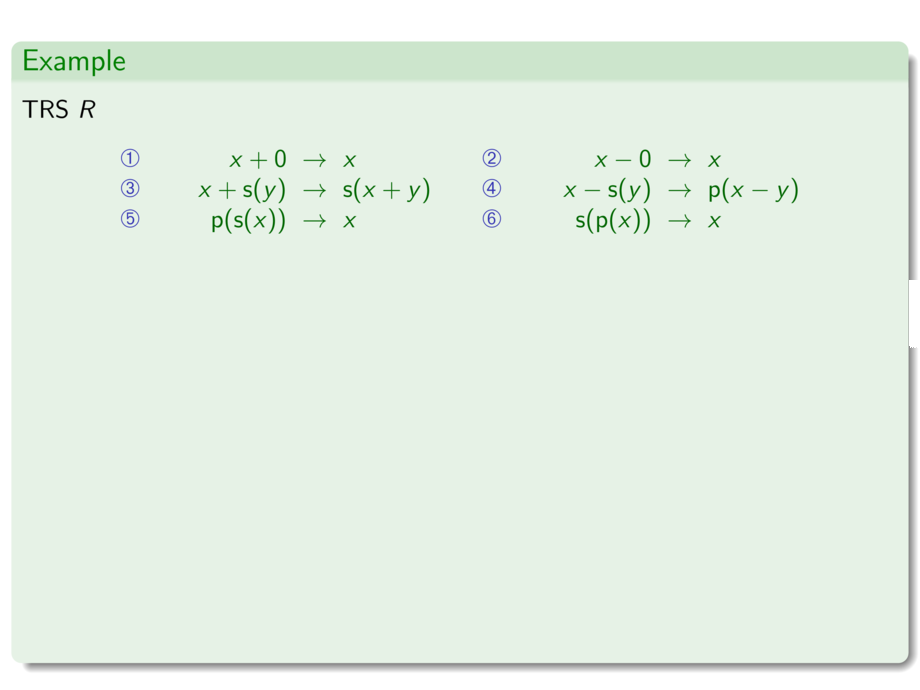
TRS $\RR$
\[
\begin{array}{lr@{~}c@{~}l@{\qquad}lr@{~}c@{~}l}
\structure{\text{\ding{192}}} & \GREEN{x+\m{0}}
& \GREEN{\to} & \GREEN{x} &
\structure{\text{\ding{193}}} & \GREEN{x-\m{0}}
& \GREEN{\to} & \GREEN{x}
\\
\structure{\text{\ding{194}}} & \GREEN{x+\m{s}(y)}
& \GREEN{\to} & \GREEN{\m{s}(x+y)} &
\structure{\text{\ding{195}}} & \GREEN{x-\m{s}(y)}
& \GREEN{\to} & \GREEN{\m{p}(x-y)}
\\
\structure{\text{\ding{196}}} & \GREEN{\m{p}(\m{s}(x))}
& \GREEN{\to} & \GREEN{x} &
\structure{\text{\ding{197}}} & \GREEN{\m{s}(\m{p}(x))}
& \GREEN{\to} & \GREEN{x}
\\
\onslide<7->{\alert{\text{\ding{198}}}} &
\onslide<7->{\alert{\m{s}(x+\m{p}(y))}}
& \onslide<7->{\alert{\to}} & \onslide<7->{\alert{x+y}} &
\onslide<8->{\alert{\text{\ding{199}}}} &
\onslide<8->{\alert{\m{p}(x-\m{p}(y))}}
& \onslide<8->{\alert{\to}} & \onslide<8->{\alert{x-y}}
\end{array}
\]
\vspace{-3ex}
\begin{itemize}
\item<2->
\makebox[2cm][l]{SN \only<2>{?}} \onslide<3->
(e.g.) LPO with precedence $\GREEN{+} > \mG{s}$ and $\GREEN{-} > \mG{p}$
\item<4->
\makebox[2cm][l]{WCR ?} \onslide<5->
4 critical pairs
\vspace{-1ex}
\begin{tabbing}
\begin{tikzpicture}[on grid,baseline=(1).baseline,node distance=17mm]
\node (1) {\MG{\ol{x+\ul{\m{s}(\m{p}(y))}}}};
\node (2) [below left=of 1] {\MGr{x+y}};
\node (3) [below right=of 1] {\MGl{\m{s}(x+\m{p}(y))}};
\draw[->] (1) -- (2) node[midway,left] {\ssd{197}};
\draw[->] (1) -- (3) node[midway,right] {\ssd{194}};
\onslide<7->{\alert{
\draw[->] (3) -- (2) node[midway,below] {\scriptsize \ding{198}};
}}
\end{tikzpicture}
\qquad\qquad\qquad \=
\begin{tikzpicture}[on grid,baseline=(1).baseline,node distance=17mm]
\node (1) {\MG{\ol{x-\ul{\m{s}(\m{p}(y))}}}};
\node (2) [below left=of 1] {\MGr{x-y}};
\node (3) [below right=of 1] {\MGl{\m{p}(x-\m{p}(y))}};
\draw[->] (1) -- (2) node[midway,left] {\ssd{197}};
\draw[->] (1) -- (3) node[midway,right] {\ssd{195}};
\onslide<8->{\alert{
\draw[->] (3) -- (2) node[midway,below] {\scriptsize \ding{199}};
}}
\end{tikzpicture}
\\[.5ex]
\begin{tikzpicture}[on grid,baseline=(1).baseline,node distance=17mm]
\node (1) {\MG{\ol{\m{p}(\ul{\m{s}(\m{p}(x))})}}};
\node (2) [below left=of 1] {\MGr{\m{p}(x)}};
\node (3) [below right=of 1] {\MGl{\m{p}(x)}};
\draw[->] (1) -- (2) node[midway,left] {\ssd{197}};
\draw[->] (1) -- (3) node[midway,right] {\ssd{196}};
\onslide<6->{
\path (2) -- (3) node[midway] {\strut $\alert<6>{=}$};
}
\end{tikzpicture}
\>
\begin{tikzpicture}[on grid,baseline=(1).baseline,node distance=17mm]
\node (1) {\MG{\ol{\m{s}(\ul{\m{p}(\m{s}(x))})}}};
\node (2) [below left=of 1] {\MGr{\m{s}(x)}};
\node (3) [below right=of 1] {\MGl{\m{s}(x)}};
\draw[->] (1) -- (2) node[midway,left] {\ssd{196}};
\draw[->] (1) -- (3) node[midway,right] {\ssd{197}};
\onslide<6->{
\path (2) -- (3) node[midway] {\strut $\alert<6>{=}$};
}
\end{tikzpicture}
\end{tabbing}
\end{itemize}
\end{example}
\end{frame}